Highlights:
The Guided Sequence
11/3/23
By:
Jerry Ragle, CDT
Diagnostic are key
All guided cases must start with restorative diagnostics, without diagnostics there is no data to design the surgical guide. Below are the sequence of steps to follow:
Protocol
Laboratory to receive pre‐op models/scans or impressions, from the general dentist.
From the models, impressions or scans, diagnostics designs will be completed according to the dentists prescribe restorative
Screenshots will be sent to the general dentist for discussion and approval.
Optional temp flipper can be made, as in this case, as a trial esthetic and bite confirmation which also allows the patient an opportunity to express suggestions, or corrections, to the final appliance.
Once diagnostics are completed and approved, scan files will be created.
Final files will include STL's of the upper and lower, with and without diagnostics, and dicom files.
All files will be uploaded to an Imaging Center.
A Zoom review will be scheduled with the dentist and surgeon.
After review, and implant placement completed, an STL file will be received from the imaging center.
RDL will print the guide and place the appropriate sleeves.
The 3D model with guide and the surgical report will be sent to the surgeon.
Times
Allow (5‐7) days for diagnostics and screenshots.
(2‐4) days for scheduled review.
Following approval of the review allow (3‐5) days for delivery of all needed materials.
Note: Times do not include patient scheduling/delays etc.
Implants are placed and case is ready to restore overview
Scanning
Encode: Scan in the normal manner making sure the surface of the Encode is visible.
Healing Abutments: Remove, select appropriate scan bodies for type of implant placed, scan in the normal manner. (Be sure to include scans with and without scan bodies in place)
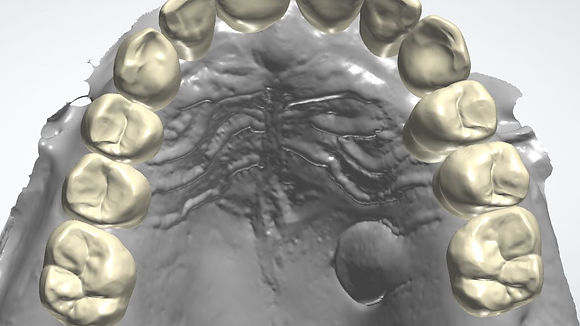
For fully edentulous, as the case shown, scan the arch fully, including the palate.
In most cases, the palate will allow the final scan to be referenced to the diagnostic bite scan.
If diagnostics were not done previously, a traditional method utilizing a bite rim will be needed.
The design of the final restoration will be based on the diagnostic work-up.
Screenshots will be sent for approval before final abutments are made and bridge is milled whether cement or screw retained.
Times: Cement retained
Initial design of custom abutments using the diagnostic design for the final restorations.
Design screenshots will be sent via text for approval.
(Allow 8-10 days In-Lab)
Once approved, custom abutments and design are finalized.
Design will be milled in PMMA, or IPN print, for initial tryin.
Custom abutments received by lab and fit-checked.
Case will be sent for try-in.
(Allow 8-10 Days In-Lab)
At Try-in
Adjust bite as needed, scan in place picking up as much tissue area as possible, especially in the palate which is used to merge this scan to the original.
Bite Option 1: Take a Blu-Mousse bite. We will print the new scan and opposing to create a scan bite.
Bite Option 2: Scan upper and lower together as a bite scan. Send upper scan, lower scan and bite scan which will be used to reorient the original scan bite and make the appropriate adjustments to design.
Make note of any esthetic changes needing to be made for final design.
Final Milled Zirconia with Custom Abutments - In-Lab Working Days 7
The patient can wear the temps until the finals are sent, however there is an issue in making sure the abutments fit the final zirconia since we won't have them. There are 3 options.
1) If the margins are supragingival
Scan the abutments in place as a new case.
We will then take the current bridge design and adapt to the new case and proceed in the normal manner.
2) If margins are subgingival
Send the abutments back (Inconvenient)
Or purchase a second set of abutments. (Costly)
3) The work-around
We adjust the internal aspect where we think the hold-up(s) will be
If not fully seating, the abutment itself will mark the internal surface of the zirconia as a grey metal mark as to where the hold up is.
The marks a small, few and hard to see without magnification, but they will hold the case up ever so slight. Probably will take a few, on and off times, until case is fully seating.
Note: Always return the printed model to check fit.
Screw Retained
A digital model will be made with digital analogs.
Stock MUA's: will be measured, ordered and placed in the digital model.
Note: Stock MUA's will be non-engaging if zero degree, engaging if angled.
(Allow 5 Days In-Lab)
If Custom MUA's: these will be designed using the diagnostics. Once designed, the custom MUA's will be milled by Tru-Abutment.
(Add 5 additional days to the above)
Once MUA's are received they are placed on the analog printed model.
MUA scan bodies are placed, case is scanned for the restorative design.
Restorative design will be milled in PMMA, or IPN print, for initial try-in.
(Allow 10 Days In-Lab)
Case is tried in with MUA copings to check fit.
If bridge rocks, cut the bridge where needed until fully seated and lute together and return. Temp will be remade and returned for try-in.
(Allow 5 Days In-Lab)
If fit is good, final zirconia bridge can now be completed, finished and copings placed for delivery.
(Allow 7 Days In-Lab)
Note: Times do not include patient scheduling/delays etc.
Two sets of MUA copings are always needed for an MUA case.

Latest News